OpenAI-Compatible
Overview
Open WebUI connects to any server or provider that implements the OpenAI-compatible API. This guide covers how to set up connections for popular cloud providers and local servers.
For OpenAI itself (or Azure OpenAI), see the dedicated OpenAI guide.
Protocol-Oriented Design
Open WebUI is built around Standard Protocols. Instead of building specific modules for every individual AI provider (which leads to inconsistent behavior and configuration bloat), Open WebUI focuses on protocols like the OpenAI Chat Completions Protocol.
This means that while Open WebUI handles the interface and tools, it expects your backend to follow the universal Chat Completions standard.
- We Support Protocols: Any provider that follows widely adopted API standards is natively supported. We also have experimental support for Open Responses.
- We Avoid Proprietary APIs: We do not implement provider-specific, non-standard APIs in the core to maintain a universal, maintainable codebase. For unsupported providers, use a pipe or a middleware proxy like LiteLLM or OpenRouter to bridge them.
For a detailed explanation of this architectural decision, see our FAQ on protocol support.
When you add a connection, Open WebUI verifies it by calling the provider's /models endpoint using a standard Bearer token. Some providers do not implement the /models endpoint at all or use non-standard authentication for it. In these cases:
- The connection verification will fail with an error (e.g., 400, 401 or 403).
- This does not mean the provider is incompatible — chat completions will still work.
- You just need to manually add model names to the Model IDs (Filter) allowlist in the connection settings.
Providers with known /models issues:
| Provider | /models works? | Action Needed |
|---|---|---|
| Anthropic | Yes — built-in compatibility layer | Auto-detection works |
| GitHub Models | No — uses non-standard path | Add model IDs manually to the whitelist |
| Perplexity | No — endpoint doesn't exist | Add model IDs manually to the whitelist |
| MiniMax | No — endpoint doesn't exist | Add model IDs manually to the whitelist |
| OpenRouter | Yes — but returns thousands of models | Strongly recommend adding a filtered allowlist |
| Google Gemini | Yes | Auto-detection works |
| DeepSeek | Yes | Auto-detection works |
| Mistral | Yes | Auto-detection works |
| Groq | Yes | Auto-detection works |
How to add models manually: In the connection settings, find Model IDs (Filter), type the model ID, and click the + icon, then save. The models will then appear in your model selector even though the connection verification showed an error.
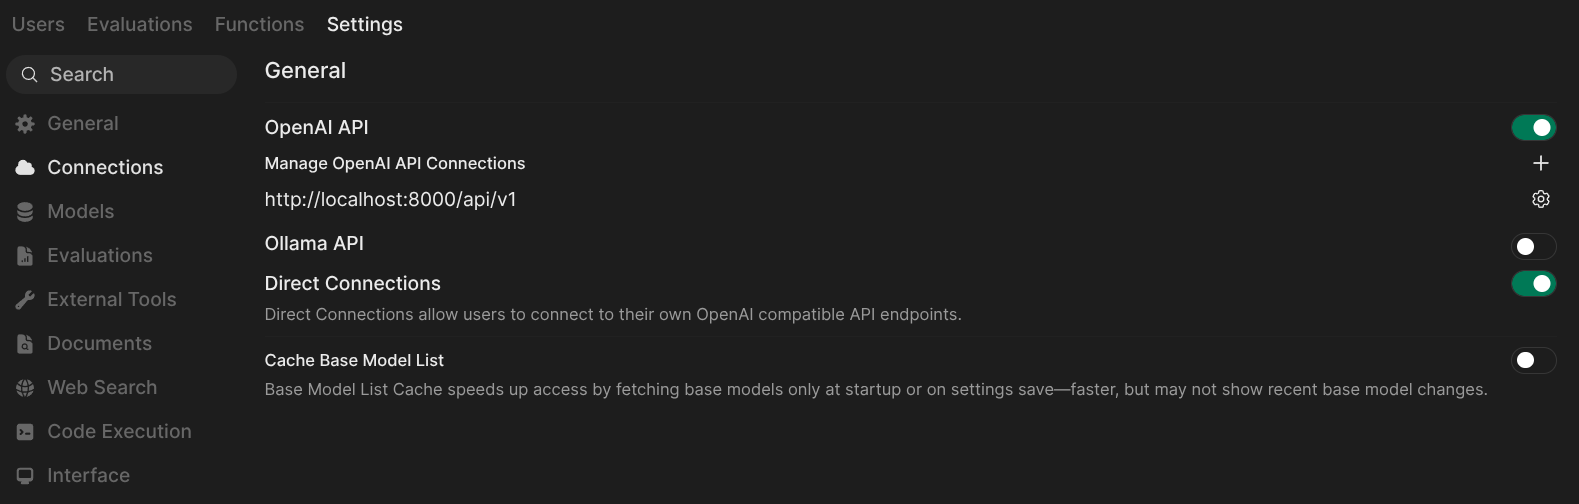
Step 1: Add Your Provider Connection
- Open Open WebUI in your browser.
- Go to ⚙️ Admin Settings → Connections → OpenAI.
- Click ➕ Add Connection.
- Fill in the URL and API Key for your provider (see tabs below). The URL field will suggest common provider endpoints as you type.
- If your provider doesn't support
/modelsauto-detection, add your model IDs to the Model IDs (Filter) allowlist. - Click Save.
If running Open WebUI in Docker and your model server is on the host machine, replace localhost with host.docker.internal in the URL.
Each connection has a toggle switch that lets you enable or disable it without deleting the connection. This is useful for temporarily deactivating a provider while preserving its configuration.
Cloud Providers
- Anthropic
- Google Gemini
- DeepSeek
- Mistral
- Groq
- Perplexity
- MiniMax
- OpenRouter
- Amazon Bedrock
- Azure OpenAI
- LiteLLM
See the dedicated Anthropic (Claude) guide for a full step-by-step walkthrough.
Anthropic (Claude) offers an OpenAI-compatible endpoint. Open WebUI includes a built-in compatibility layer that automatically detects Anthropic URLs and handles model discovery — just plug in your API key and models are auto-detected. Note that this is intended for testing and comparison — for production use with full Claude features (PDF processing, citations, extended thinking, prompt caching), Anthropic recommends their native API.
| Setting | Value |
|---|---|
| URL | https://api.anthropic.com/v1 |
| API Key | Your Anthropic API key from console.anthropic.com |
| Model IDs | Auto-detected — leave empty or filter to specific models |
Google Gemini provides an OpenAI-compatible endpoint that works well with Open WebUI.
| Setting | Value |
|---|---|
| URL | https://generativelanguage.googleapis.com/v1beta/openai |
| API Key | Your Gemini API key from aistudio.google.com |
| Model IDs | Auto-detected — leave empty or filter to specific models |
The URL must be exactly https://generativelanguage.googleapis.com/v1beta/openai — without a trailing slash. A trailing slash will break the /models endpoint call.
DeepSeek is fully OpenAI-compatible with working /models auto-detection.
| Setting | Value |
|---|---|
| URL | https://api.deepseek.com/v1 |
| API Key | Your API key from platform.deepseek.com |
| Model IDs | Auto-detected (e.g., deepseek-chat, deepseek-reasoner) |
Mistral AI is fully OpenAI-compatible with working /models auto-detection.
| Setting | Value |
|---|---|
| URL | https://api.mistral.ai/v1 |
| API Key | Your API key from console.mistral.ai |
| Model IDs | Auto-detected (e.g., mistral-large-latest, codestral-latest, mistral-small-latest) |
Groq provides extremely fast inference via an OpenAI-compatible API.
| Setting | Value |
|---|---|
| URL | https://api.groq.com/openai/v1 |
| API Key | Your API key from console.groq.com |
| Model IDs | Auto-detected (e.g., llama-3.3-70b-versatile, deepseek-r1-distill-llama-70b) |
Perplexity offers search-augmented AI models via an OpenAI-compatible chat completions endpoint.
| Setting | Value |
|---|---|
| URL | https://api.perplexity.ai |
| API Key | Your API key from perplexity.ai/settings (under API tab) |
| Model IDs | Required — add manually (e.g., sonar-pro, sonar-reasoning-pro, sonar-deep-research) |
Perplexity does not have a /models endpoint. You must manually add model IDs to the allowlist. Some Perplexity models may also reject certain parameters like stop or frequency_penalty.
MiniMax is a leading AI company providing high-performance coding-focused models. Their latest model, MiniMax M2.5, is specifically optimized for coding, reasoning, and multi-turn dialogue. Their Coding Plan subscription is significantly more cost-effective for high-frequency programming than standard pay-as-you-go pricing.
| Setting | Value |
|---|---|
| URL | https://api.minimax.io/v1 |
| API Key | Your Coding Plan API key (see Step 2 below) |
| Model IDs | Required — add manually (e.g., MiniMax-M2.5) |
Step 1: Subscribe to a MiniMax Coding Plan
- Visit the MiniMax Coding Plan Subscription page.
- Choose a plan that fits your needs (e.g., the Starter plan for $10/month).
- Complete the subscription process.
The Starter plan provides 100 "prompts" every 5 hours. One prompt is roughly equivalent to 15 requests, offering substantial value compared to token-based billing. See the MiniMax Coding Plan Official Documentation for details.
Step 2: Obtain Your Coding Plan API Key
Once subscribed, you need your specialized API Key.
- Navigate to the Account/Coding Plan page.
- Click on Reset & Copy to generate and copy your API Key.
- Safely store this key in a password manager.
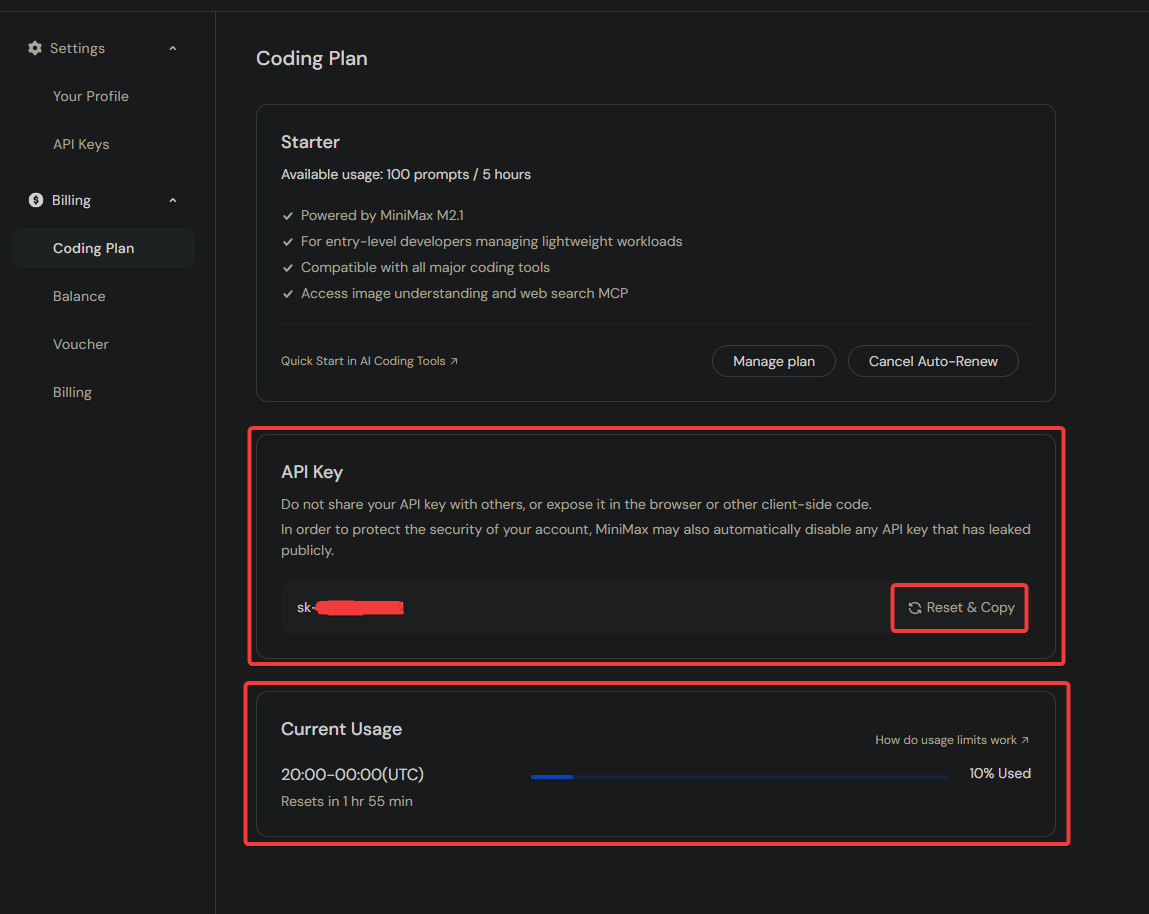
This API Key is exclusive to the Coding Plan and is not interchangeable with standard pay-as-you-go API Keys.
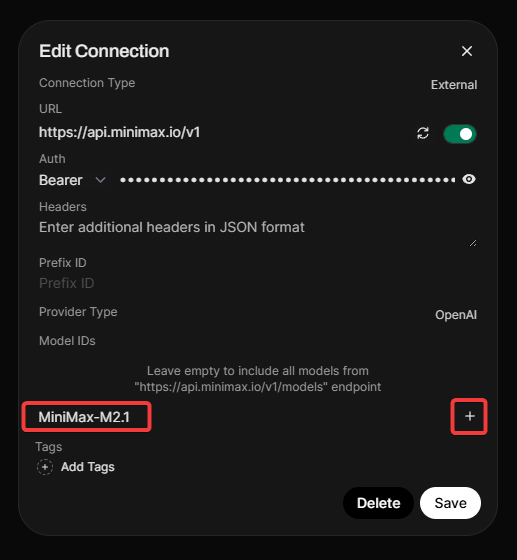
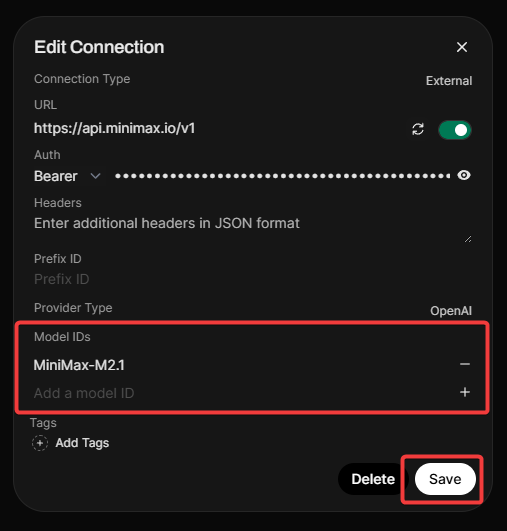
Step 3: Configure Connection in Open WebUI
- Open Open WebUI and navigate to Admin Panel > Settings > Connections.
- Click the + (plus) icon under the OpenAI API section.
- Enter the URL and API Key from the table above.
- Important: MiniMax does not expose a
/modelsendpoint, so you must add the model manually. - In the Model IDs (Filter), type
MiniMax-M2.5and click the + icon. - Click Verify Connection (you should see a success alert).
- Click Save.
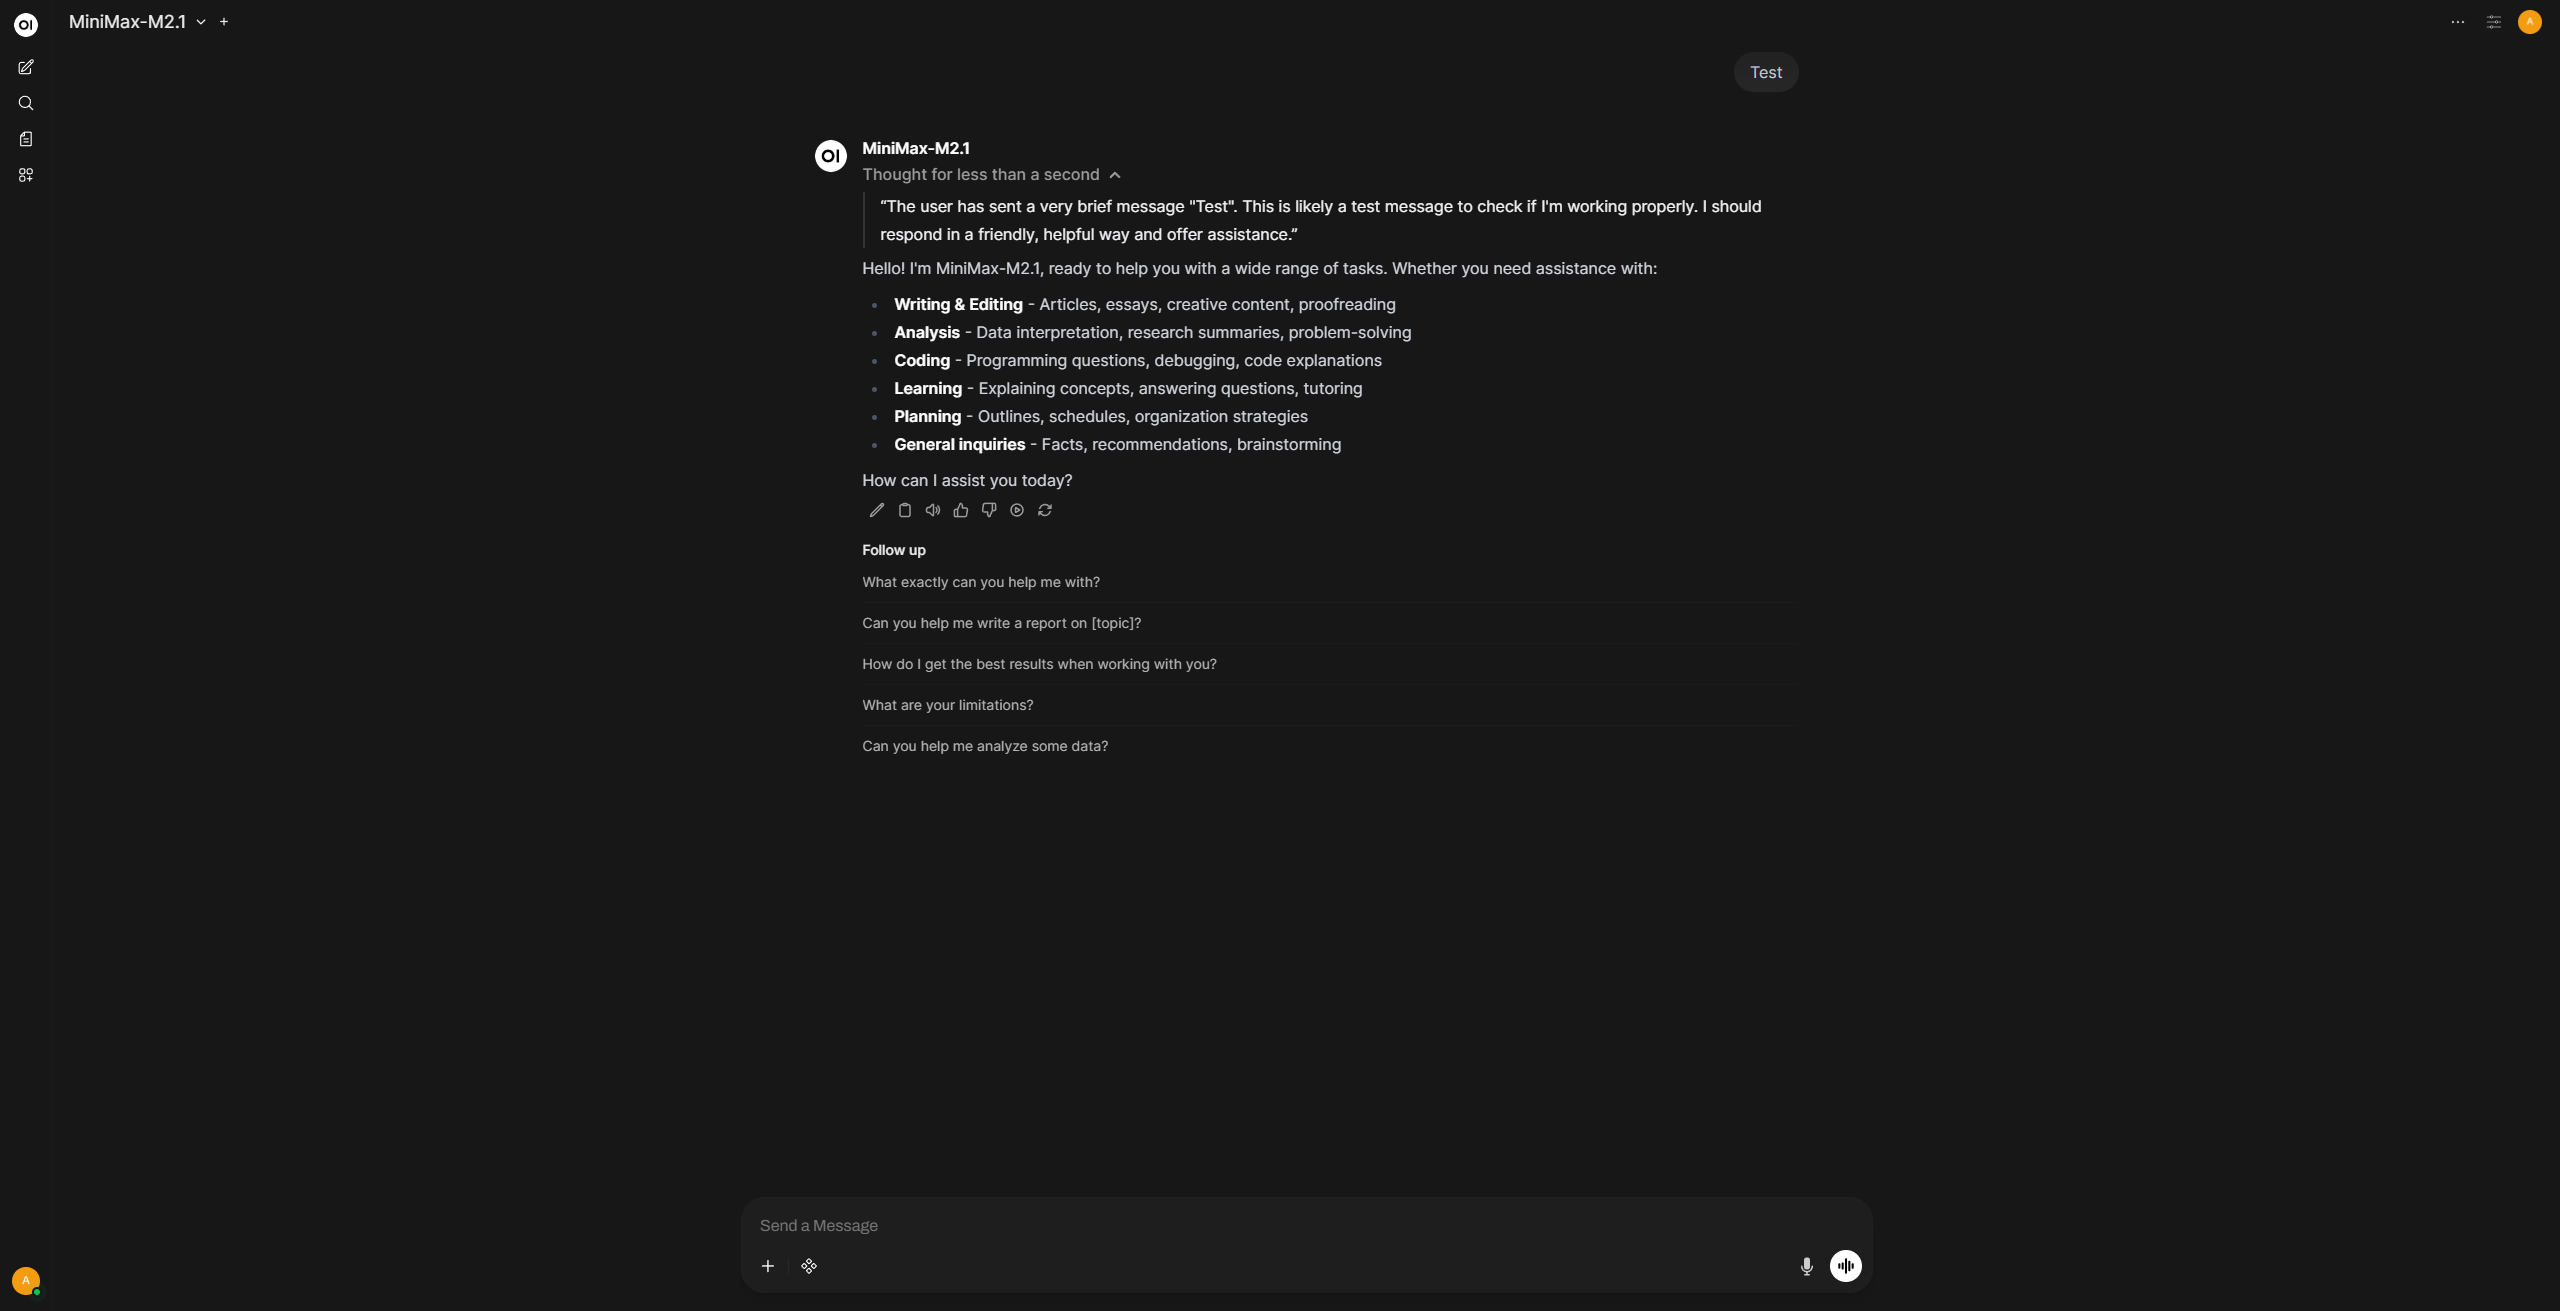
Step 4: Start Chatting
Select MiniMax-M2.5 from the model dropdown and start chatting. Reasoning and thinking work by default without any additional configuration.
OpenRouter aggregates hundreds of models from multiple providers behind a single API.
| Setting | Value |
|---|---|
| URL | https://openrouter.ai/api/v1 |
| API Key | Your API key from openrouter.ai/keys |
| Model IDs | Strongly recommended — add a filtered allowlist |
OpenRouter exposes thousands of models, which will clutter your model selector and slow down the admin panel. We strongly recommend:
- Use an allowlist — add only the specific model IDs you need (e.g.,
anthropic/claude-sonnet-4-5,google/gemini-2.5-pro). - Enable model caching via
Settings > Connections > Cache Base Model ListorENABLE_BASE_MODELS_CACHE=True. Without caching, page loads can take 10-15+ seconds. See the Performance Guide for more details.
Amazon Bedrock is a fully managed AWS service that provides access to foundation models from leading AI companies (Anthropic, Meta, Mistral, Cohere, Stability AI, Amazon, and more) through a single API.
There are multiple OpenAI-compatible ways to connect Open WebUI to AWS Bedrock:
- Bedrock Access Gateway (BAG)
- stdapi.ai
- LiteLLM with its Bedrock provider (LiteLLM is not dedicated to AWS).
- Bedrock Mantle - AWS native solution, no installation required
Feature Comparison
| Capability | Bedrock Access Gateway (BAG) | stdapi.ai | LiteLLM (Bedrock provider) | AWS Bedrock Mantle |
|---|---|---|---|---|
| Automatic models discovery | ✅ | ✅ | — | ✅ |
| Chat completion | ✅ | ✅ | ✅ | ✅ |
| Embeddings | ✅ | ✅ | ✅ | — |
| Text to speech | — | ✅ | — | — |
| Speech to text | — | ✅ | — | — |
| Image generation | — | ✅ | ✅ | — |
| Image editing | — | ✅ | — | — |
| Models from multiple regions | — | ✅ | ✅ | — |
| No installation required | — | — | — | ✅ |
| License | MIT | AGPL or Commercial | MIT or Commercial | AWS Service |
Solution 1: Bedrock Access Gateway (BAG)
Prerequisites
- An active AWS account
- An active AWS Access Key and Secret Key
- IAM permissions in AWS to enable Bedrock models (or already enabled models)
- Docker installed on your system
Step 1: Configure the Bedrock Access Gateway
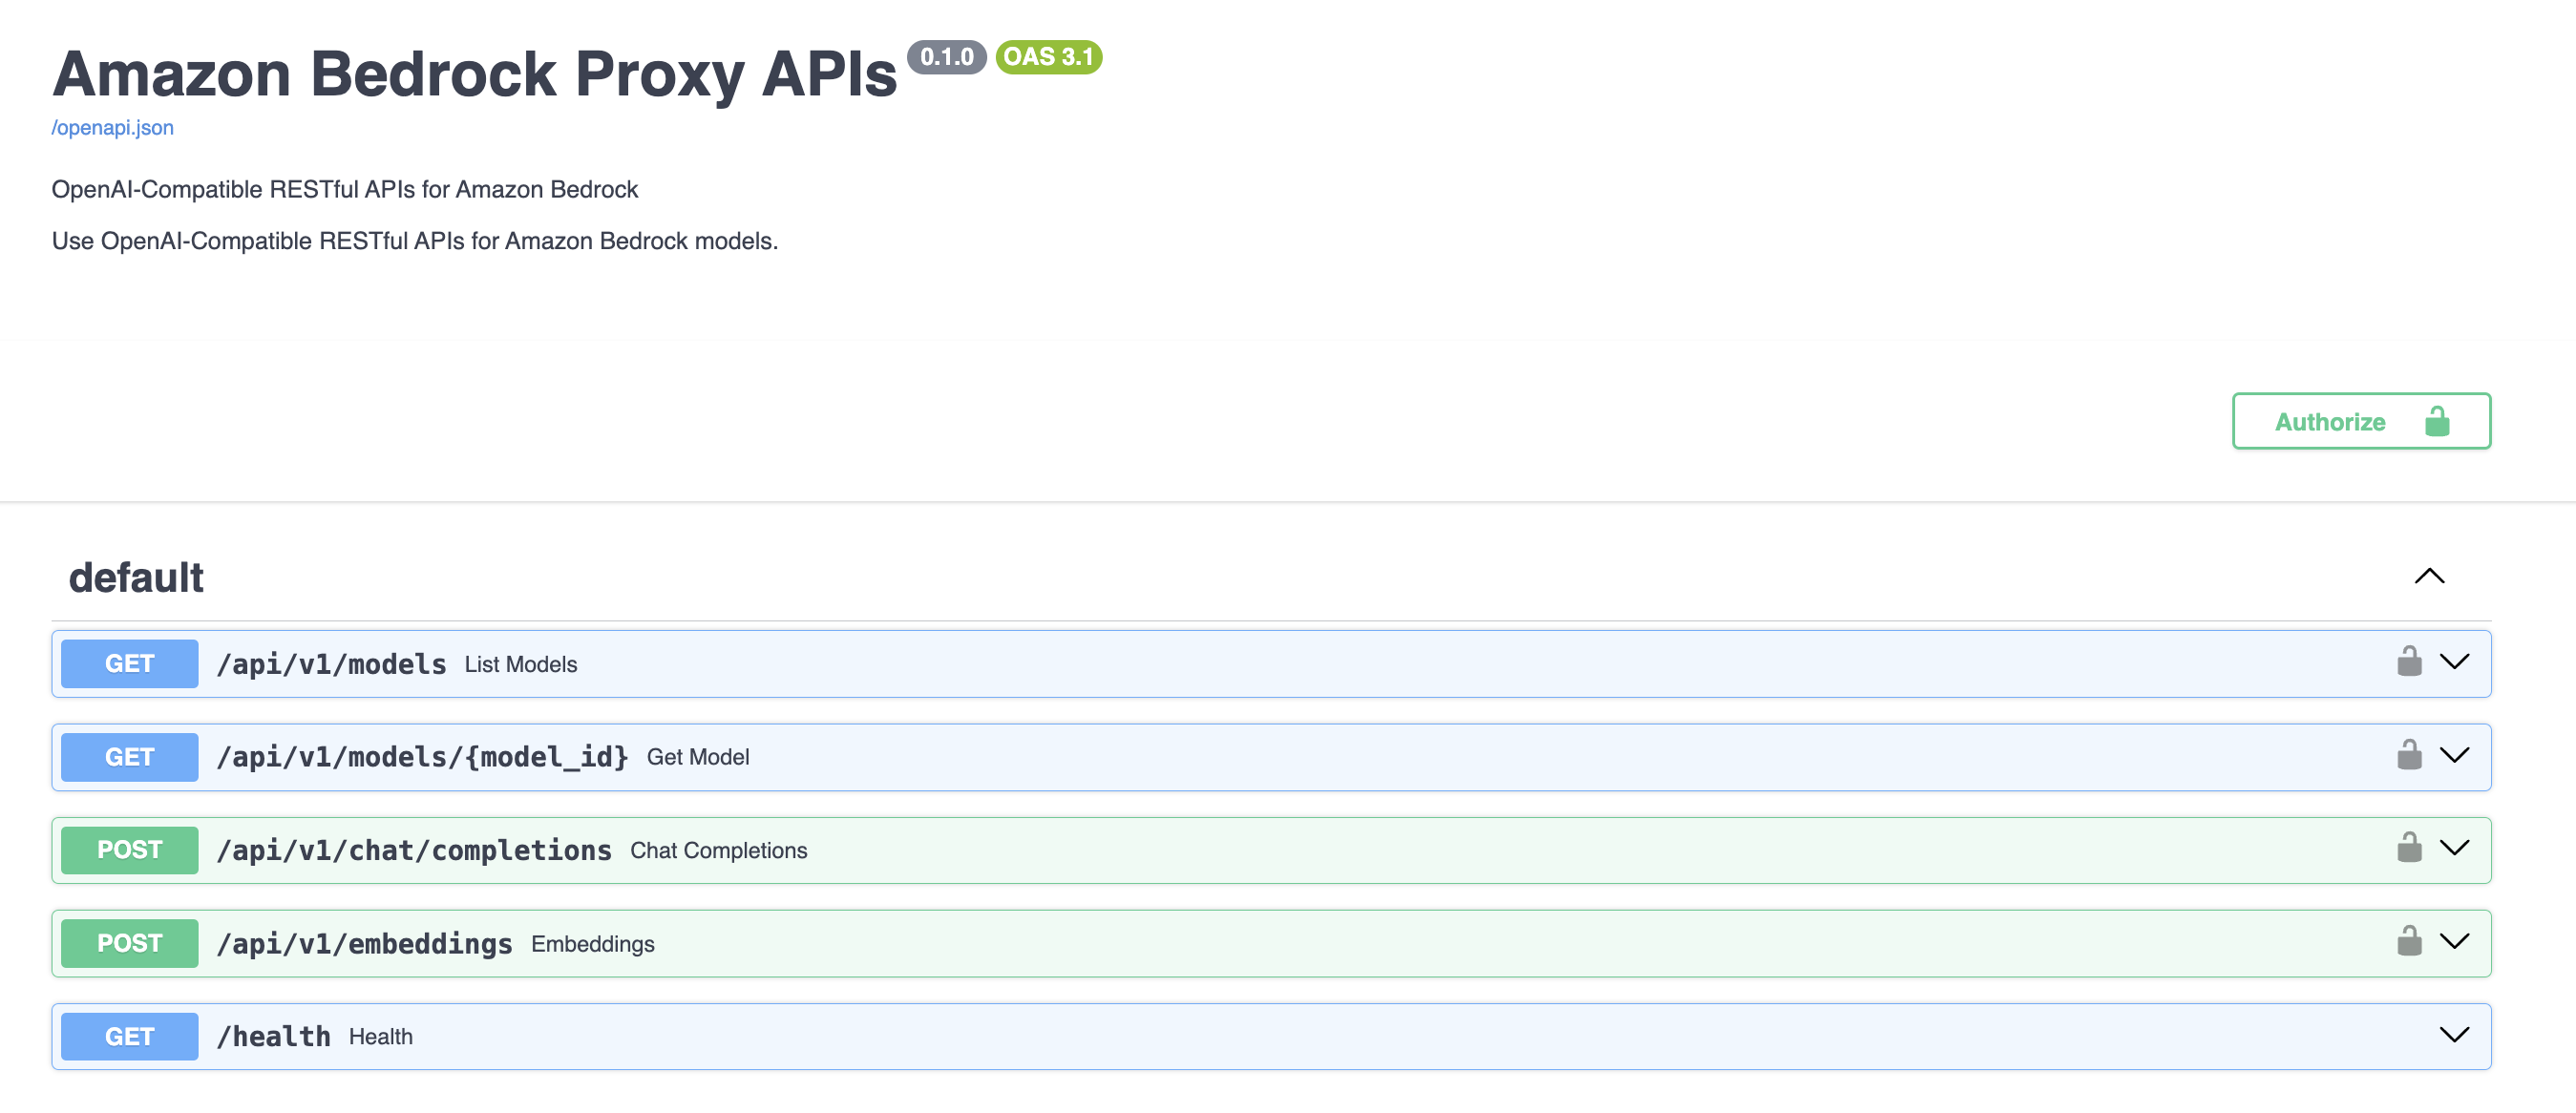
The BAG is a proxy developed by AWS that wraps around the native Bedrock SDK and exposes OpenAI-compatible endpoints. Here's the endpoint mapping:
| OpenAI Endpoint | Bedrock Method |
|---|---|
/models | list_inference_profiles |
/models/{model_id} | list_inference_profiles |
/chat/completions | converse or converse_stream |
/embeddings | invoke_model |
Set up the BAG from the Bedrock Access Gateway repo:
git clone https://github.com/aws-samples/bedrock-access-gateway
cd bedrock-access-gateway
# Use the ECS Dockerfile
mv Dockerfile_ecs Dockerfile
docker build . -f Dockerfile -t bedrock-gateway
docker run -e AWS_ACCESS_KEY_ID=$AWS_ACCESS_KEY_ID \
           -e AWS_SECRET_ACCESS_KEY=$AWS_SECRET_ACCESS_KEY \
           -e AWS_SESSION_TOKEN=$AWS_SESSION_TOKEN \
           -e AWS_REGION=us-east-1 \
           -d -p 8000:80 bedrock-gateway
Verify the gateway is running by visiting the Swagger page at http://localhost:8000/docs.
If the container starts and immediately exits (especially on Windows), check the logs with docker logs <container_id>. If you see Python/Uvicorn errors, this is likely a Python 3.13 compatibility issue. Edit the Dockerfile before building and change python:3.13-slim to python:3.12-slim, then rebuild.
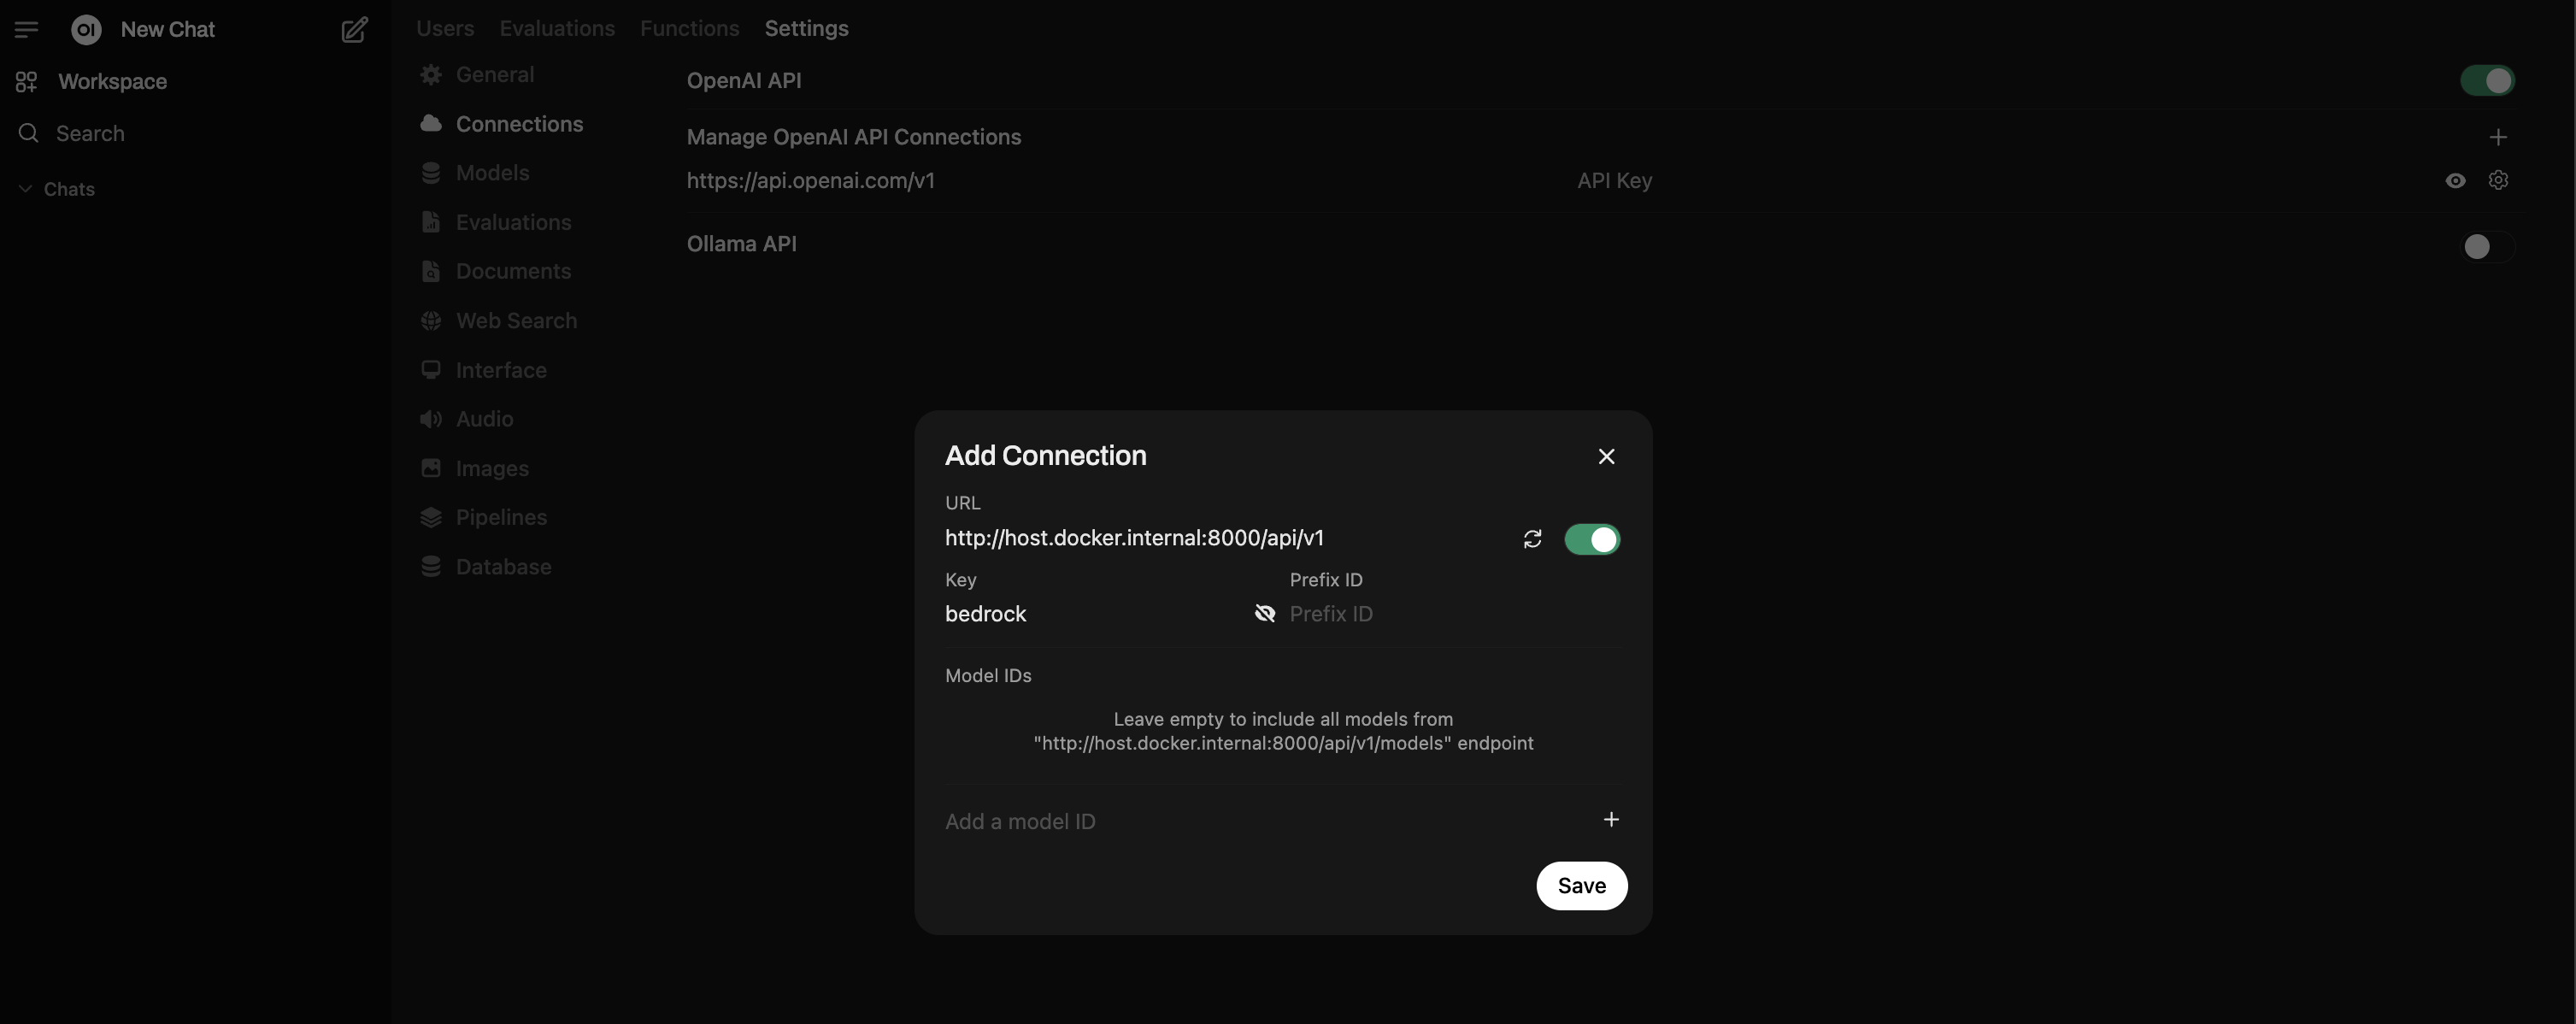
Step 2: Add Connection in Open WebUI
- Under the Admin Panel, go to Settings → Connections.
- Use the + button to add a new connection under OpenAI.
- For the URL, use
http://host.docker.internal:8000/api/v1. - For the API Key, the default key defined in BAG is
bedrock(you can change this viaDEFAULT_API_KEYSin BAG settings). - Click Verify Connection — you should see a "Server connection verified" alert.
Other Helpful Tutorials
Solution 2: stdapi.ai
stdapi.ai is an OpenAI-compatible API gateway you deploy in your AWS account, or run locally using Docker.
Open WebUI connects to it as if it were OpenAI, and stdapi.ai routes requests to Bedrock and other AWS AI services such as Amazon Polly and Transcribe. It also supports multi-region access to Bedrock, making it easier to reach more models that may only be available in specific AWS regions.
Deploying on AWS
stdapi.ai provides a full Terraform sample that provisions Open WebUI on ECS Fargate, connects it to stdapi.ai, and includes supporting services like Elasticache Valkey, Aurora PostgreSQL with vector extension, SearXNG, and Playwright. This method handles both the stdapi.ai and Open WebUI configuration:
stdapi.ai also provides documentation and Terraform samples to deploy it independently if you prefer to connect it to an existing Open WebUI instance.
Deploying Locally
stdapi.ai also provides a Docker image for local usage.
Here is a minimal command to run it using your AWS access key:
docker run \
  -e AWS_ACCESS_KEY_ID=$AWS_ACCESS_KEY_ID \
  -e AWS_SECRET_ACCESS_KEY=$AWS_SECRET_ACCESS_KEY \
  -e AWS_SESSION_TOKEN=$AWS_SESSION_TOKEN \
  -e AWS_BEDROCK_REGIONS=us-east-1,us-west-2 \
  -e ENABLE_DOCS=true \
  --rm \
  -p 8000:8000 \
  ghcr.io/stdapi-ai/stdapi.ai-community:latest
The application is now available at http://localhost:8000 (use it as YOUR_STDAPI_URL in the Open WebUI configuration below).
The AWS_BEDROCK_REGIONS variable lets you select regions where you want to load models, in this case us-east-1 and us-west-2.
If you pass the ENABLE_DOCS=true variable, an interactive Swagger documentation page is available at http://localhost:8000/docs.
API_KEY=my_secret_password can also be used to set a custom API key for the application (defaults to no API key required). This is highly recommended if the server is reachable from elsewhere. Use this API key as YOUR_STDAPI_KEY in the Open WebUI configuration below.
Many other configuration options are available; see the documentation for more information.
Open WebUI Configuration
Open WebUI is configured via environment variables, and you can also set the same values from the Open WebUI admin panel.
Use the same stdapi.ai key for all *_OPENAI_API_KEY entries.
Core connection (chat + background tasks):
OPENAI_API_BASE_URL=YOUR_STDAPI_URL/v1
OPENAI_API_KEY=YOUR_STDAPI_KEY
# Use a fast, low-cost chat model for `TASK_MODEL_EXTERNAL`.
TASK_MODEL_EXTERNAL=amazon.nova-micro-v1:0
RAG embeddings:
RAG_EMBEDDING_ENGINE=openai
RAG_OPENAI_API_BASE_URL=YOUR_STDAPI_URL/v1
RAG_OPENAI_API_KEY=YOUR_STDAPI_KEY
RAG_EMBEDDING_MODEL=cohere.embed-v4:0
Image generation:
ENABLE_IMAGE_GENERATION=true
IMAGE_GENERATION_ENGINE=openai
IMAGES_OPENAI_API_BASE_URL=YOUR_STDAPI_URL/v1
IMAGES_OPENAI_API_KEY=YOUR_STDAPI_KEY
IMAGE_GENERATION_MODEL=stability.stable-image-core-v1:1
Image editing:
ENABLE_IMAGE_EDIT=true
IMAGE_EDIT_ENGINE=openai
IMAGES_EDIT_OPENAI_API_BASE_URL=YOUR_STDAPI_URL/v1
IMAGES_EDIT_OPENAI_API_KEY=YOUR_STDAPI_KEY
IMAGE_EDIT_MODEL=stability.stable-image-control-structure-v1:0
Speech to text (STT):
AUDIO_STT_ENGINE=openai
AUDIO_STT_OPENAI_API_BASE_URL=YOUR_STDAPI_URL/v1
AUDIO_STT_OPENAI_API_KEY=YOUR_STDAPI_KEY
AUDIO_STT_MODEL=amazon.transcribe
Text to speech (TTS):
AUDIO_TTS_ENGINE=openai
AUDIO_TTS_OPENAI_API_BASE_URL=YOUR_STDAPI_URL/v1
AUDIO_TTS_OPENAI_API_KEY=YOUR_STDAPI_KEY
AUDIO_TTS_MODEL=amazon.polly-neural
If you see inconsistent auto-detection for TTS languages, set a fixed language in stdapi.ai (for example, DEFAULT_TTS_LANGUAGE=en-US).
Solution 3: AWS Bedrock Mantle
Bedrock Mantle is an AWS-native solution that provides an OpenAI-compatible API endpoint for Amazon Bedrock without requiring any additional infrastructure or installation. This makes it the simplest integration option for accessing Bedrock models.
Key Advantages
- No installation required - Uses AWS-managed endpoints directly
- Simple configuration - Just requires an API key
- Native AWS integration - Fully managed by AWS
Limitations
- Chat completion only - Does not support embeddings, image generation, or other features
- Subset of models - Only provides access to a limited selection of Bedrock models (Open weight models)
- Single region - Does not support multi-region access
Prerequisites
- An active AWS account
- An Amazon Bedrock API key (create one from the AWS console)
- IAM permissions to use Bedrock models (recommended:
AmazonBedrockMantleInferenceAccessIAM policy)
Configuration
Configure Open WebUI using environment variables:
OPENAI_API_BASE_URL=https://bedrock.us-east-1.api.aws/v1
OPENAI_API_KEY=your_bedrock_api_key
Replace your_bedrock_api_key with the Amazon Bedrock API key you created.
Replace us-east-1 in the URL with your preferred AWS region (e.g., us-west-2, eu-west-1, etc.).
You can also set the same values from the Open WebUI admin panel.
For more information, see the Bedrock Mantle documentation.
Start using Bedrock Base Models
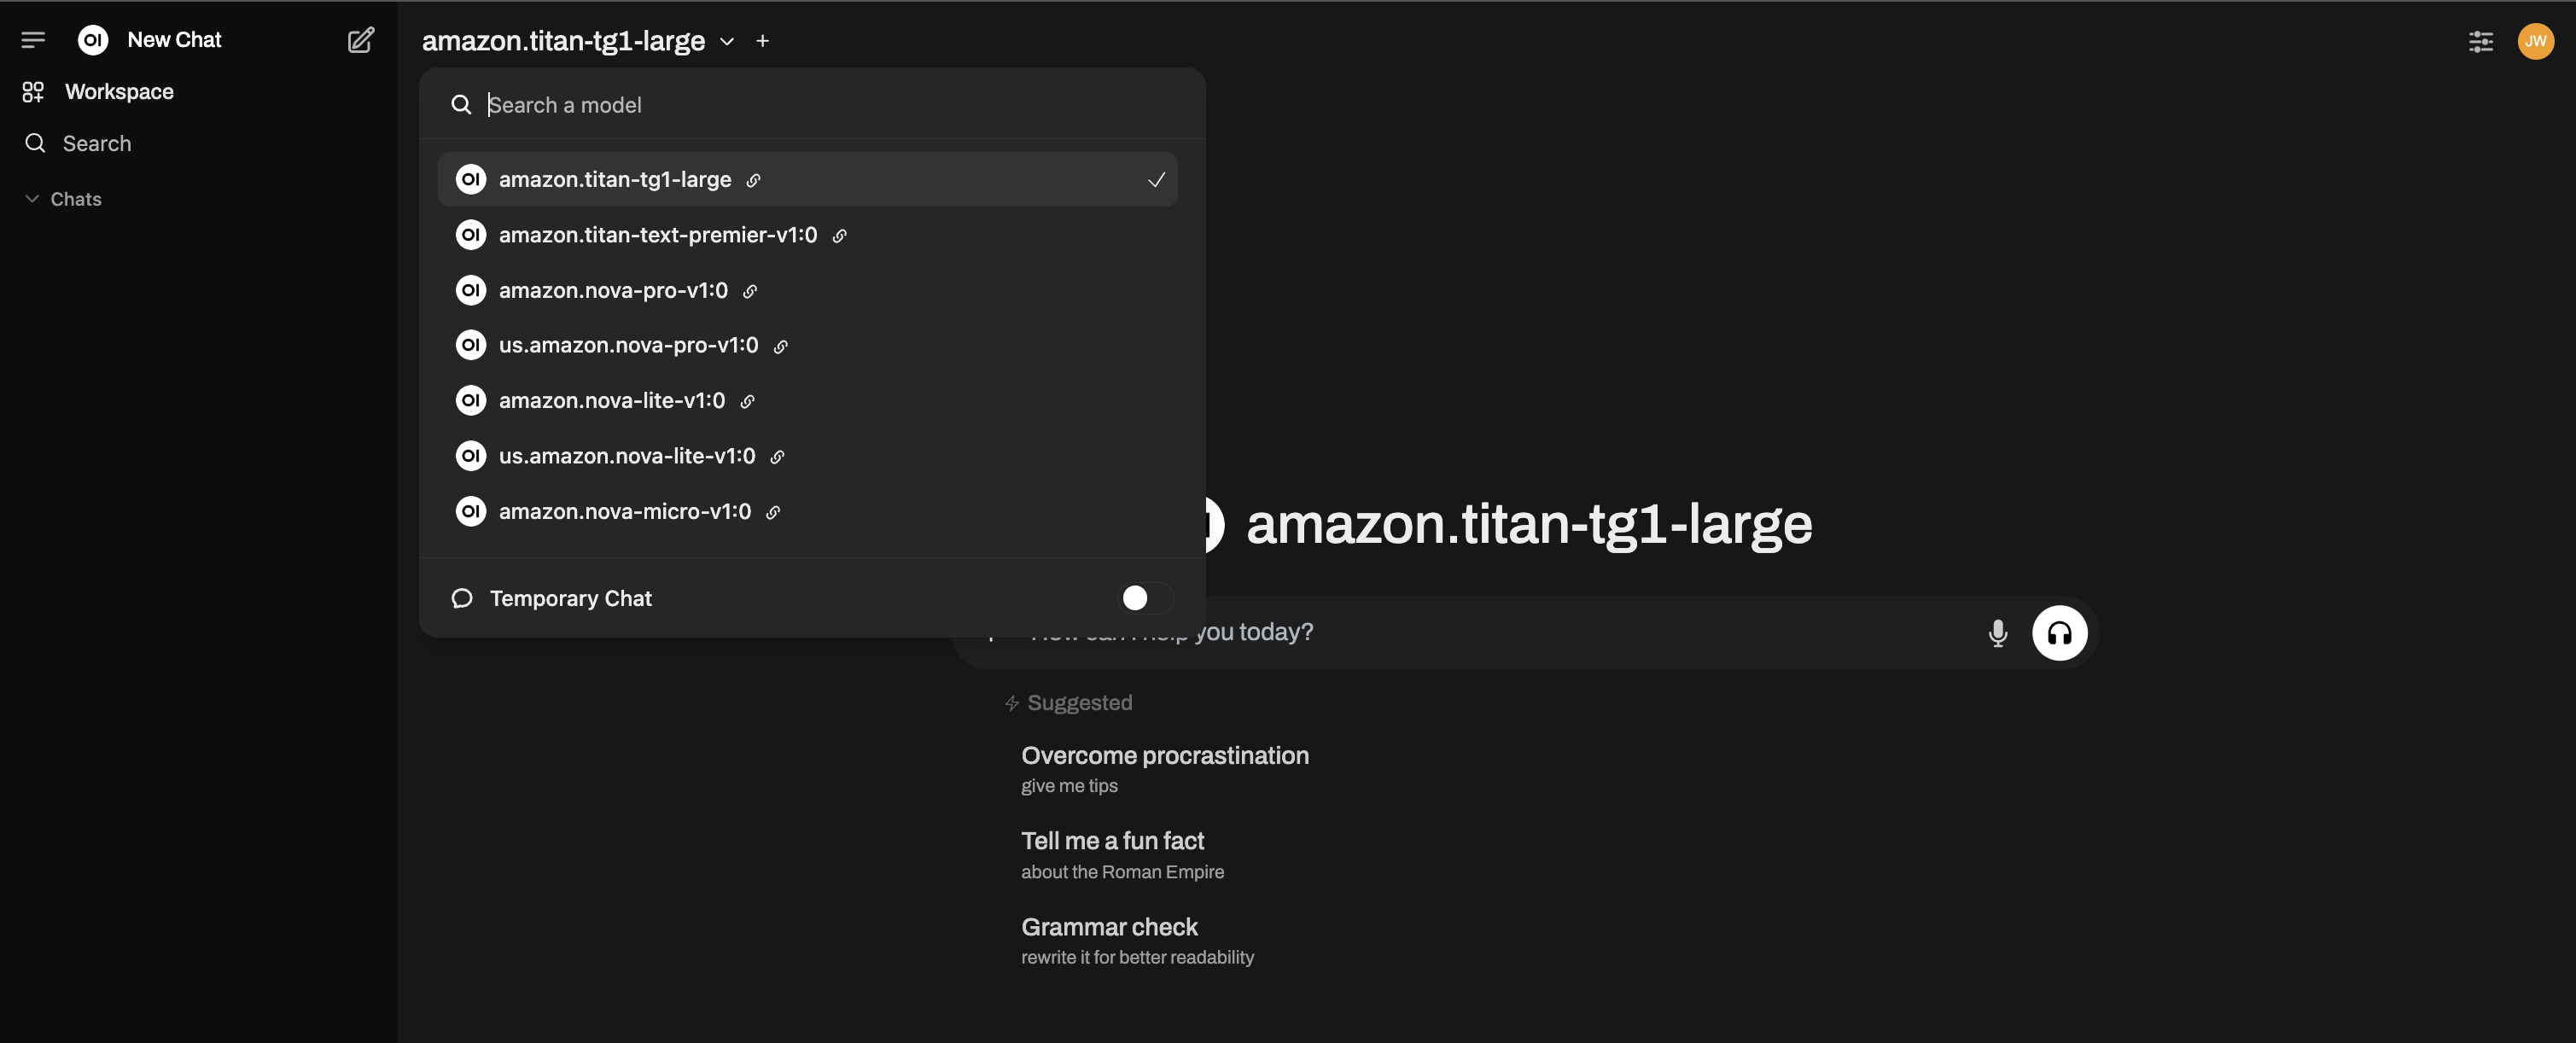
You should now see all your Bedrock models available!
Azure OpenAI provides enterprise-grade OpenAI hosting through Microsoft Azure.
To add an Azure OpenAI connection, you need to switch the provider type in the connection dialog:
- In the connection form, find the Provider Type button (it says OpenAI by default).
- Click it to toggle it to Azure OpenAI.
- Fill in the settings below.
| Setting | Value |
|---|---|
| Provider Type | Click to switch to Azure OpenAI |
| URL | Your Azure endpoint (e.g., https://my-resource.openai.azure.com) |
| API Version | e.g., 2024-02-15-preview |
| API Key | Your Azure API Key |
| Model IDs | Required — add your specific Deployment Names (e.g., my-gpt4-deployment) |
Azure OpenAI uses deployment names as model IDs, not standard OpenAI model names. You must add your deployment names to the Model IDs allowlist.
For advanced keyless authentication using Azure Entra ID (RBAC, Workload Identity, Managed Identity), see the Azure OpenAI with EntraID tutorial.
LiteLLM is a proxy server that provides a unified OpenAI-compatible API across 100+ LLM providers (Anthropic, Google, Azure, AWS Bedrock, Cohere, and more). It translates between provider-specific APIs and the OpenAI standard.
| Setting | Value |
|---|---|
| URL | http://localhost:4000/v1 (default LiteLLM proxy port) |
| API Key | Your LiteLLM proxy key (if configured) |
| Model IDs | Auto-detected from your LiteLLM configuration |
Quick setup:
pip install litellm
litellm --model gpt-4 --port 4000
For production deployments, configure models via litellm_config.yaml. See the LiteLLM docs for details.
LiteLLM is useful as a universal bridge when you want to use a provider that doesn't natively support the OpenAI API standard, or when you want to load-balance across multiple providers.
Local Servers
- Llama.cpp
- Lemonade
- LM Studio
- vLLM
- LocalAI
- Docker Model Runner
Llama.cpp runs efficient, quantized GGUF models locally with an OpenAI-compatible API server. See the dedicated Llama.cpp guide for full setup instructions (installation, model download, server startup).
| Setting | Value |
|---|---|
| URL | http://localhost:10000/v1 (or your configured port) |
| API Key | Leave blank |
Quick start:
./llama-server --model /path/to/model.gguf --port 10000 --ctx-size 1024 --n-gpu-layers 40
Lemonade is a plug-and-play ONNX-based OpenAI-compatible server for Windows.
| Setting | Value |
|---|---|
| URL | http://localhost:8000/api/v1 |
| API Key | Leave blank |
Getting started with Lemonade:
- Download the latest
.exeinstaller. - Run
Lemonade_Server_Installer.exe. - Install and download a model using Lemonade's installer.
- Once running, your API endpoint will be
http://localhost:8000/api/v1.
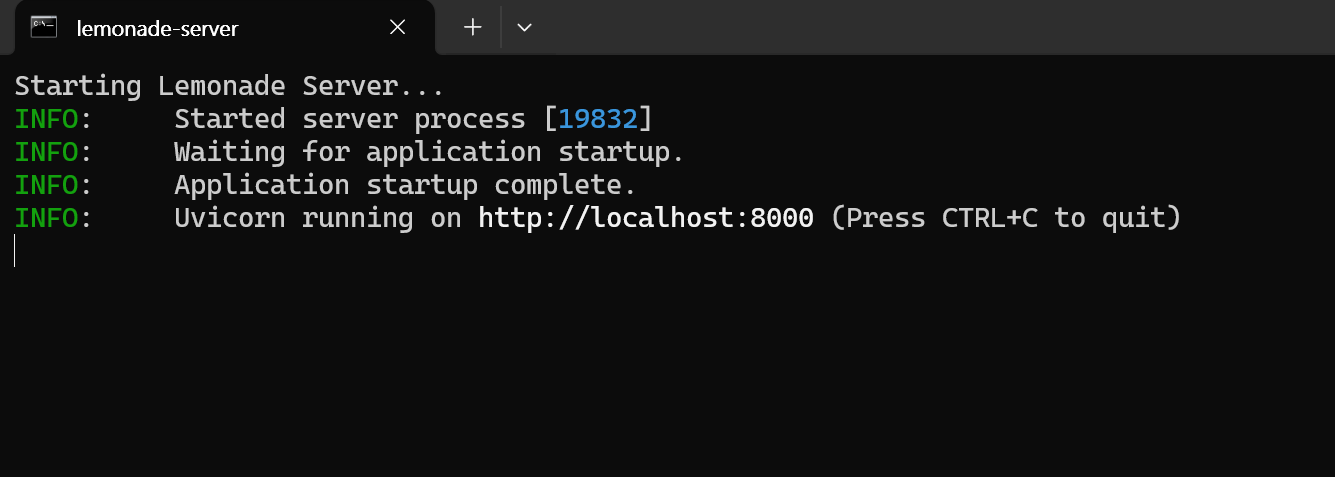
See their docs for details.
Then add the connection in Open WebUI using the URL and API Key above:
LM Studio provides a local OpenAI-compatible server with a GUI for model management.
| Setting | Value |
|---|---|
| URL | http://localhost:1234/v1 |
| API Key | Leave blank (or lm-studio as placeholder) |
Start the server in LM Studio via the "Local Server" tab before connecting.
vLLM is a high-throughput inference engine with an OpenAI-compatible server. See the dedicated vLLM guide for full setup instructions.
| Setting | Value |
|---|---|
| URL | http://localhost:8000/v1 (default vLLM port) |
| API Key | Leave blank (unless configured) |
LocalAI is a drop-in OpenAI-compatible replacement that runs models locally.
| Setting | Value |
|---|---|
| URL | http://localhost:8080/v1 |
| API Key | Leave blank |
Docker Model Runner runs AI models directly in Docker containers.
| Setting | Value |
|---|---|
| URL | http://localhost:12434/engines/llama.cpp/v1 |
| API Key | Leave blank |
See the Docker Model Runner docs for setup instructions.
If your server is slow to start or you're connecting over a high-latency network, you can adjust the model list fetch timeout:
# Adjust timeout for slower connections (default is 10 seconds)
AIOHTTP_CLIENT_TIMEOUT_MODEL_LIST=5
If you've saved an unreachable URL and the UI becomes unresponsive, see the Model List Loading Issues troubleshooting guide for recovery options.
Required API Endpoints
To ensure full compatibility with Open WebUI, your server should implement the following OpenAI-standard endpoints:
| Endpoint | Method | Required? | Purpose |
|---|---|---|---|
/v1/models | GET | Recommended | Used for model discovery and selecting models in the UI. If not available, add models to the allowlist manually. |
/v1/chat/completions | POST | Yes | The core endpoint for chat, supporting streaming and parameters like temperature. |
/v1/embeddings | POST | No | Required if you want to use this provider for RAG (Retrieval Augmented Generation). |
/v1/audio/speech | POST | No | Required for Text-to-Speech (TTS) functionality. |
/v1/audio/transcriptions | POST | No | Required for Speech-to-Text (STT/Whisper) functionality. |
/v1/images/generations | POST | No | Required for Image Generation (DALL-E) functionality. |
Supported Parameters
Open WebUI passes standard OpenAI parameters such as temperature, top_p, max_tokens (or max_completion_tokens), stop, seed, and logit_bias. It also supports Tool Use (Function Calling) if your model and server support the tools and tool_choice parameters.
Step 2: Start Chatting!
Select your connected provider's model in the chat menu and get started!
That's it! Whether you choose a cloud provider or a local server, you can manage multiple connections — all from within Open WebUI.
🚀 Enjoy building your perfect AI setup!